Table of Contents
This section will explain how to add a DMZ interface to the two interface (LAN/WAN) base configuration. You must have a functioning two interface setup before starting on configuring your DMZ interface. The 1:1 NAT DMZ setup is most appropriate where you have multiple public IP's and wish to assign a single public IP to each DMZ host.
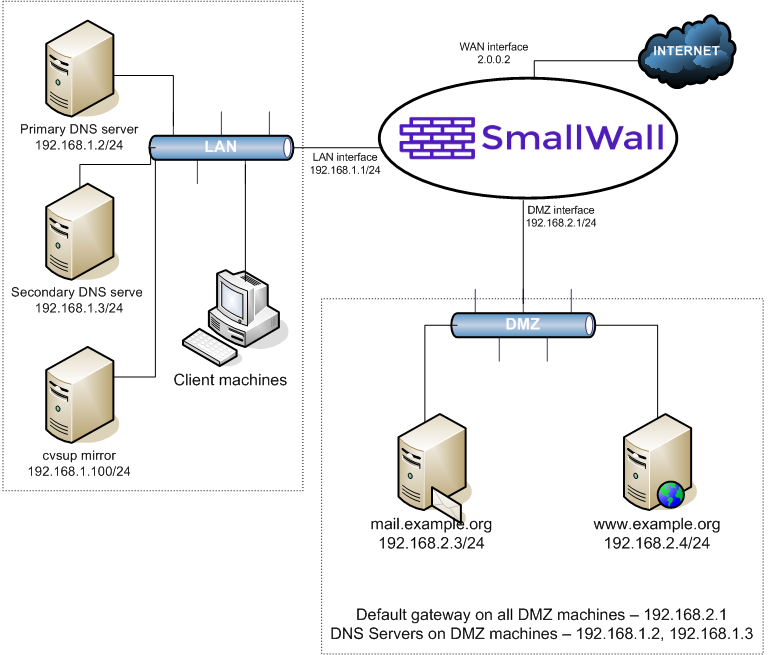
This depicts the network layout we will have after configuring our DMZ interface.
Log into your SmallWall's webGUI, and click "(assign)" next to Interfaces.
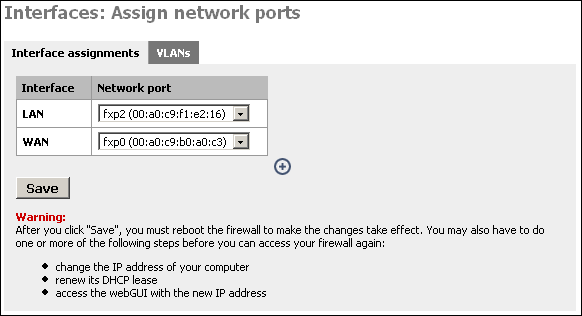
Click the ![]() on this page to add your third interface.
on this page to add your third interface.
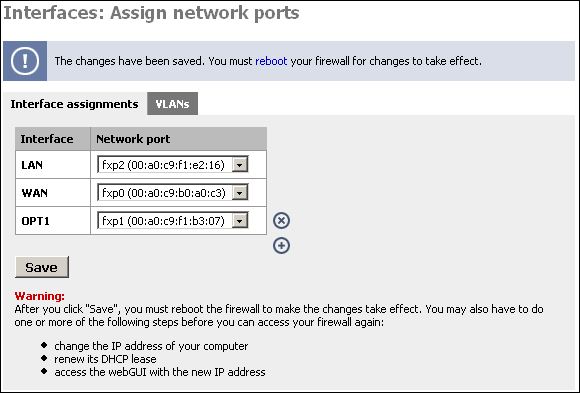
Now restart your SmallWall for the changes to take affect.
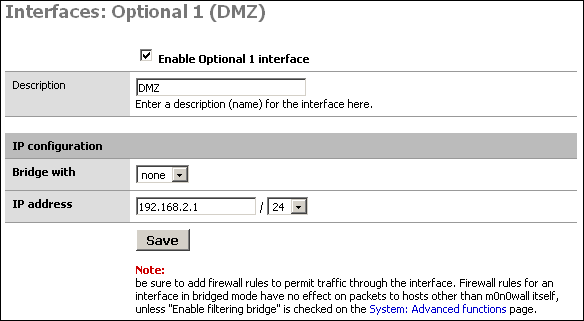
After your SmallWall restarts, log back into the webGUI. Under Interfaces, you will see OPT1. Click on it.
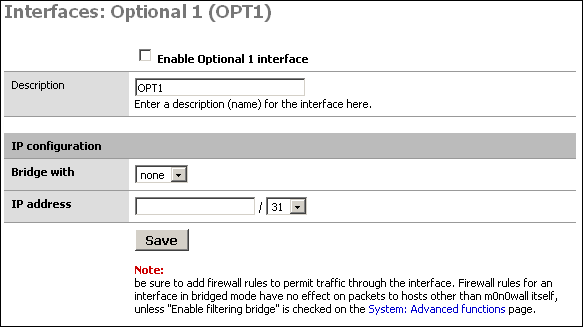
Check the box at the top to enable the interface, give it a more descriptive name (I'll call it "DMZ"), and set up the desired IP configuration. The IP subnet must be different from the LAN subnet.
The main purpose of a DMZ is to protect the LAN from the publicly-accessible Internet hosts on your network. This way if one of them were to be compromised, your LAN still has protection from the attacker. So if we don't block traffic from the DMZ to the LAN, the DMZ is basically useless.
First we will put in a firewall rule on the DMZ interface denying
all traffic to the LAN while still permitting all traffic to the WAN.
Click Firewall -> Rules, and click the ![]() at the bottom of the page.
at the bottom of the page.
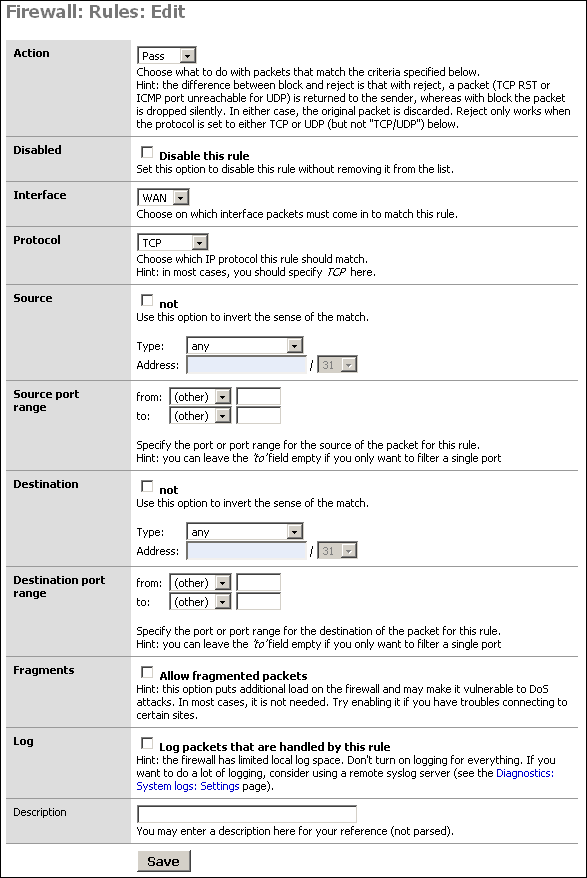
Filling out this screen as shown below will permit all traffic out the DMZ interface to the internet, but prohibit all DMZ traffic from entering the LAN. It also only permits outbound traffic from the DMZ's IP subnet since only traffic from a source IP within your DMZ should come in on the DMZ interface (unless you have a routed DMZ, which would be strange). This prevents spoofed packets from leaving your DMZ.
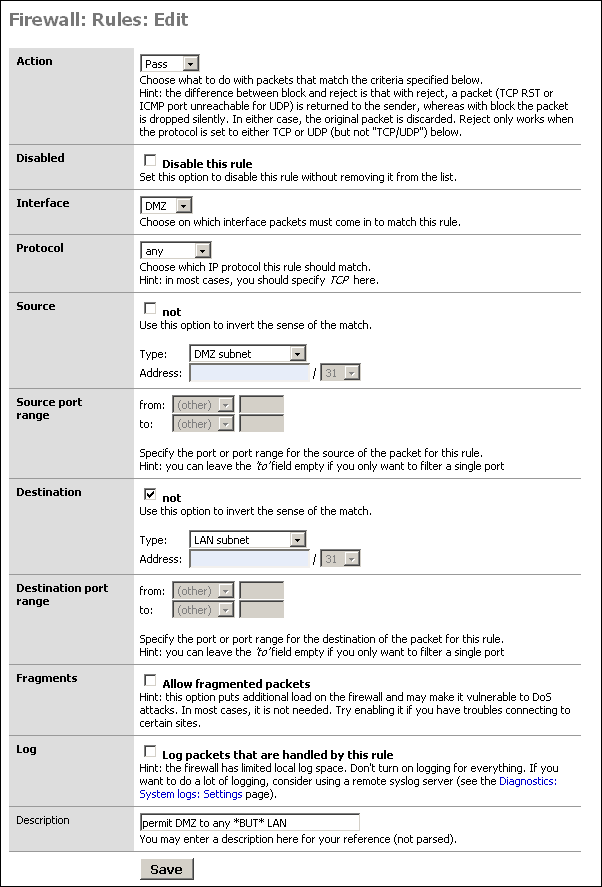
Click Save after verifying your selections. Then click Apply Changes.
You probably have some services on your LAN that your DMZ hosts will need to access. In our sample network, we need to be able to reach DNS on the two LAN DNS servers, cvsup protocol to our LAN cvsup-mirror server, and NTP for time synchronization to the time server that resides on the cvsup-mirror server.
Always use specific protocols, ports, and hosts when permitting traffic from your DMZ to your LAN. Make sure nothing that isn't required can get through.
Note
Don't forget that source ports (TCP and UDP) are randomly selected high ports, and not the same as the destination port. You'll need to use "any" for source port.
My DMZ interface firewall rules now look like the following after permitting the required services from DMZ to LAN.
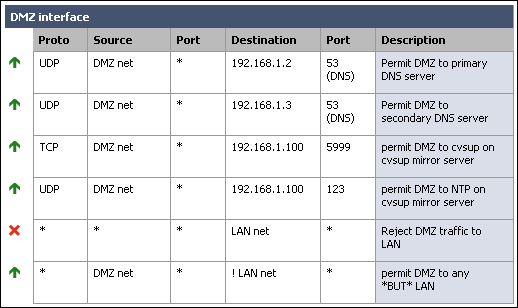
Note that I added a rule to deny any traffic coming in on the DMZ interface destined for the LAN. This was not required because of the way we configured the allow rule, however I like to put it in there to make it very clear where the traffic from DMZ to LAN is getting dropped.
When entering your rules, remember they are processed in top down order, and rule processing stops at the first match. So if you had left the rule we added above as the top rule, it would drop packets from DMZ to LAN without getting to the permit rules you added. I recommend you design your rules similar to how I have, with drop DMZ to LAN as the second last line, and permit DMZ to any except LAN as the last line.
Now you need to determine whether you'll use inbound or 1:1 NAT. If you have multiple public IP's, use 1:1 NAT. If you have only a single public IP, you'll need to use inbound NAT. If you have multiple public IP's, but more DMZ hosts than public IP's, you can use inbound NAT, or a combination of 1:1 and inbound.
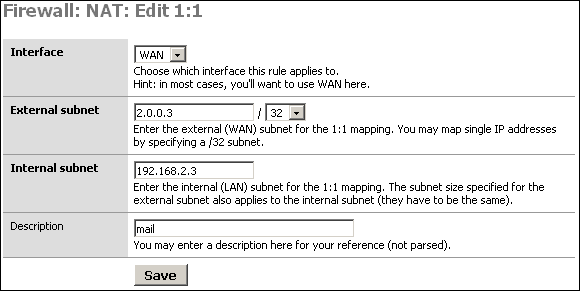
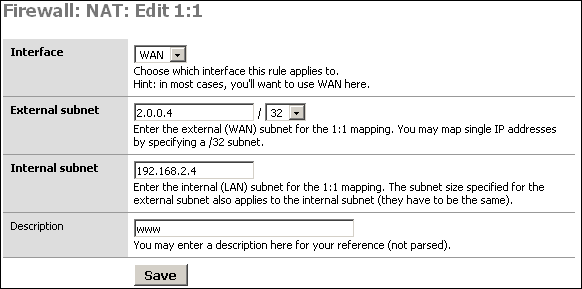
For this scenario, we'll say we have a /27 public IP subnet. We'll say it's 2.0.0.0/27. SmallWall's WAN interface has been assigned with IP 2.0.0.2. I will use 1:1 NAT to assign the public IP 2.0.0.3 to the DMZ mail server and 2.0.0.4 to the DMZ web server.
Go to the Firewall -> NAT screen and click the 1:1 tab. Click
the ![]() . I will add two entries, one each for the mail
server and web server.
. I will add two entries, one each for the mail
server and web server.
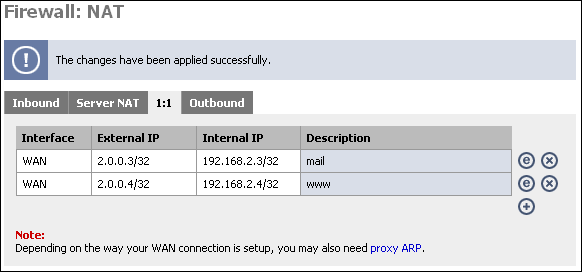
After adding the rules, click Apply changes. You'll now see something like the following.
You can test the 1:1 NAT we just configured by going to whatismyip.com on the machine configured for 1:1. If you don't have a GUI, lynx will work, or you can fetch or wget the URL and cat the resulting file. (fetch http://whatismyip.com && cat whatismyip.com | grep "IP is").
You should see the IP is the one you just configured in 1:1 NAT. If you get an IP other than the one you configured in 1:1, there is a problem with your configuration.
If you have only one public IP, or more need more
publicly-accessible servers than you have public IP addresses, you'll
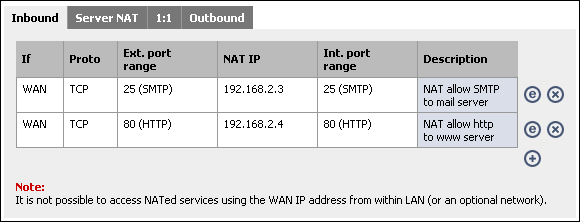
need to use inbound NAT. Go to the NAT screen, and on the Inbound tab,
click ![]() .
.
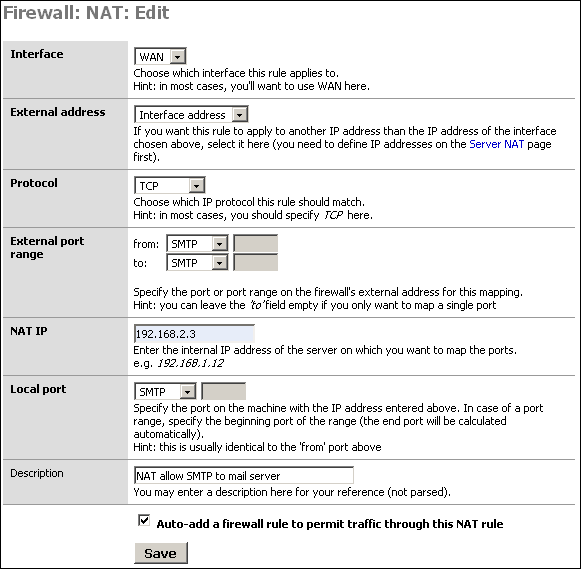
For this example, we will assume you have only one public IP, and it is the interface address of the WAN interface.
First, anything to the WAN IP to port 25 (SMTP) will go to the mail server in our DMZ.
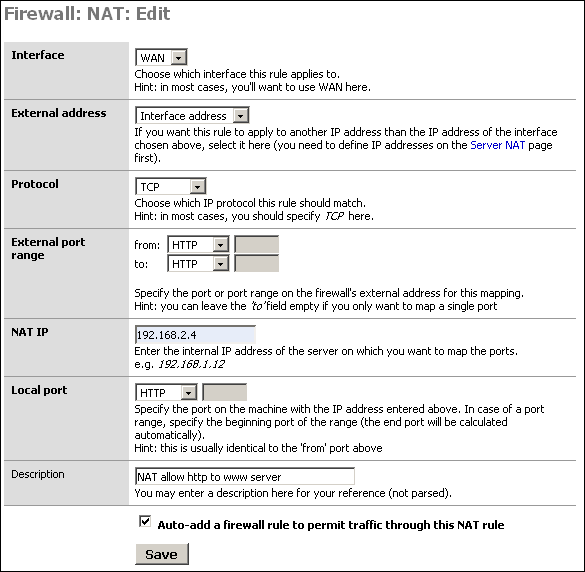
Click Save, and click ![]() to add the inbound NAT rule for the HTTP
server.
to add the inbound NAT rule for the HTTP
server.
Click "Apply changes" and your configuration will be working. It should look like the following.