This is fairly similar on operating systems that support L2TP. So I will just go over the high spots.
Start by accessing the L2TP client software.
Click whatever is needed to “Create New Connection” in your software.
You are usually presented with a Wizard. Click Next to continue.
You will probably select something like “Connect to the Network at my Workplace” from the menu.
Select Virtual Private Network and L2TP connection. (This may be two steps)
Name the connection.
Now enter the IP or FQDN (Fully Qualified Domain Name - for example, vpn.mycompany,.com) of SmallWall. (This can be any of the configured interfaces.)
Next you can either just finish or add a shortcut to the desktop. You are nearly done!
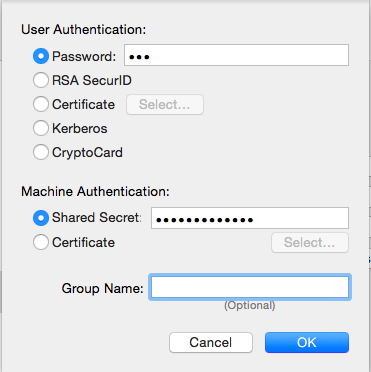
When you launch the client for the first time (Although in some cases this is done during the setup) you will be asked for a username, password, and a pre-shared key. (Which may be called a "Shared Secret" on Apple products. Successful login requires three pices of information; the username, the password and the Pre-shared Key.
Start by opening a DOS window. (Command window)
Run ipconfig and you should get something similar to the next figure:
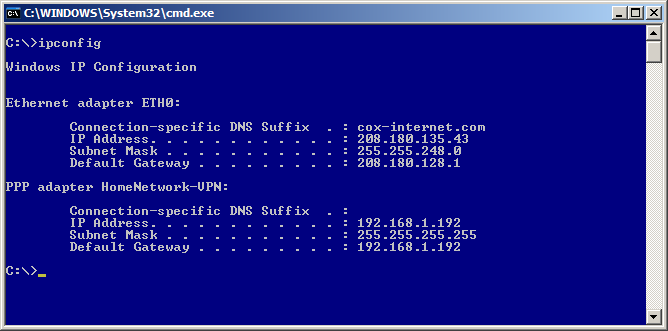
As you hopefully will see you have the settings for your physical adapter (in my case I renamed it to ETH0)
You will also see the PPP Adapter with the name you gave the VPN Connection when performing the steps in the last section. It should have an IP address that is in the range you defined for the L2TP Server. It should also have the subnet of 255.255.255.255 and it will be using itself as the default gateway. Just live with it; it is how it works.
For the more advanced who wish to know if things are all working right, Figure 6, displays a full ipconfig on the virtual adapter.
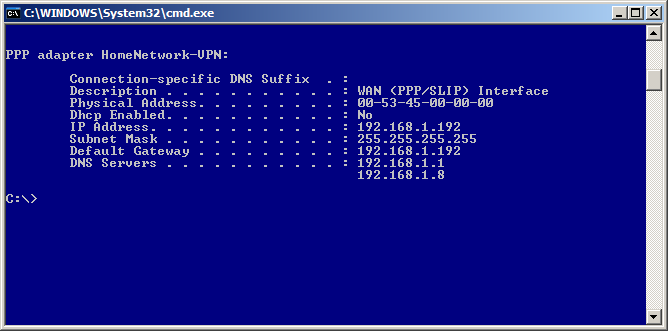
-
Now lets try doing something. If you followed the setup for this how-to you will have setup full access from the L2TP network to the LAN and WAN. If you setup selective rules you will have to test specifically what you setup. E.g. if you setup rules to only allow SMTP you will need to telnet to the host:25 that you designated in the firewall rule. Or write a new rule allowing ICMP to a host that will echo a reply back.
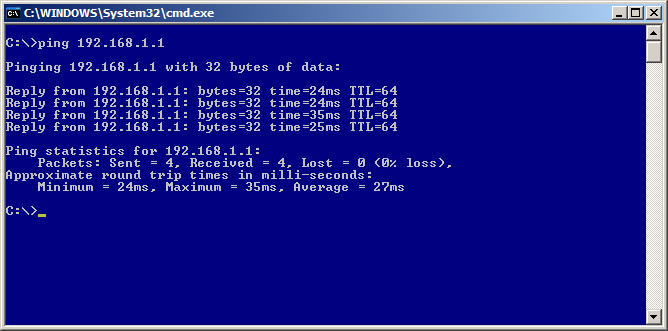
We will be sending a ICMP (Ping) to the firewall’s internal interface to test the VPN connection.
In my case the firewall is 192.168.1.1 (please use your internal address before writing to me to say pinging 192.168.1.1 didn’t work on your 10.x.x.x network. Hehe) If done right (assuming your firewall isn’t blocking internal ICMP packets) you are good for LAN access. (If you are blocking ICMP on the internal interface ping some other host on your home network.)
Now lets test beyond the firewall. Ping isn’t so good to use here as more and more people are blocking ICMP packets. So we will use tracert to check we are 1.) Routing via the PPTP tunnel and 2.) That we successful. Of course if you told the firewall to not allow WAN access then this step can be skipped.
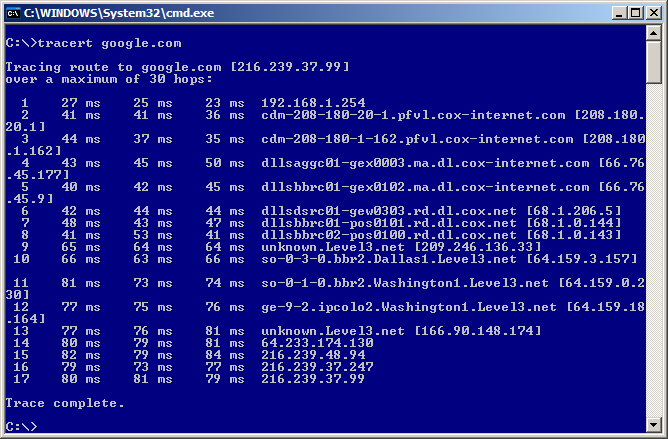
As seen in the last figure, the first hop is the L2TP “Server Address” as this is the gateway/interface for the L2TP Network.
Now check things like HTTP, etc. If you have this much and followed the directions you should be able to do everything.